1. To customize your QwickPAY receipt, you will need to login to the QwickPAY Virtual Terminal using your Merchant ID and password. These are the credentials that were sent to you when you first signed up for your QwickPAY account.
Tip: It may be easier to copy and paste your username and password directly from the email containing your credentials, rather than re-typing them.
Here are the QwickPAY credentials for SAMPLE BUSINESS NAME.
QwickPAY Merchant ID = MAG123456789
QwickPAY Merchant Password = u2!Ag7*Ap4AgYo QwickPAY credentials are case sensitive. Please enter exactly as shown above.

NOTE: If you enter your password incorrectly 5 times, your account will automatically lock and you will need to call QwickPAY Customer Support in order to access your account again.
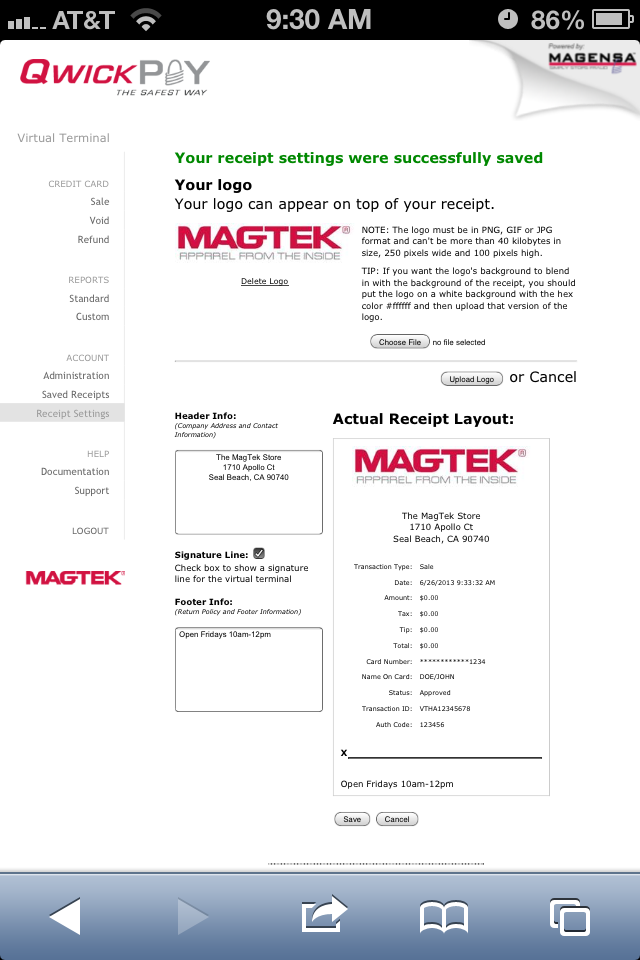
2. On the left panel, under ACCOUNT, click on “Receipt Settings”.

3. Enter the desired Header and Footer info in the appropriate boxes. You may also upload your company logo – please note that the logo MUST be in PNG, GIF, or JPG format, and it cannot be more than 40 kilobytes in size, 250 pixels wide and 100 pixels high. Once you have finished entering all of the desired content, click “Save” at the bottom of the page.
Need more help? Check out the FAQs.